
Background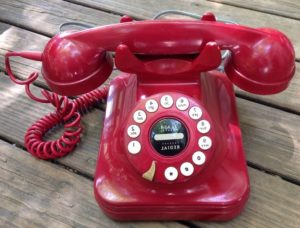
I have heard of some other people incorporating payphone like props into their displays, so I decided to try my take on it. The cost of a used payphone was more than I wanted to pay, so I ended up buying a red phone with the push buttons located in the old rotary phone style. A push button phone was required because I needed to use the buttons as inputs to my microcontroller. The plan was to have all the electronics within the phone and use a cheap MP3 player to play the dial and busy tones, and the messages.
The Electronics
The old push-button phones are pretty straight-forward and are ripe for being reworked. I took the phone apart and there was one main circuit board in it with an HM9102D IC on it. It is hard to find info for this part, but what info I could find showed me that the push buttons are organized in a 4×4 matrix. So the things I need to monitor are: 1) the buttons pressed and 2) whether the phone is off the hook or not (which I can just treat as another button), pretty basic.
The Microcontroller and its Code
For this project, I went back to an Arduino platform, and the Nano in particular. This is a great little micro for an amazing cost. You can get them direct from China (so they may be clones, but that was fine for my task) for less than $3 each (including shipping)!! The Arduino is quickly growing on me and may replace all my PICs at some point.
On the Arduino, I am using 8 digital pins for the push button Matrix, one for an LED (for debugging purposes), two for hardware serial for debug, two for MP3 player software serial, one for whether or not the MP3 player is still busy playing, and one to detect if the phone is hung up for not.
Upon boot, the micro monitors the headset and waits for a user to take the phone off the hook. Once the phone is off the hook, I start playing a dial tone MP3 on repeat mode. Then I start taking turns strobing the 4 rows of push-buttons, one at a time with a ground (0V) and read the 4 columns one at a time. If I see a 0V (ground; the inputs have internal pull-ups on them) on one of the columns, I figure out what button was pressed and play that MP3. I then monitor the BUSY signal from the MP3 player as well as the headset off-the-hook button, if the user hangs the phone up, I stop the MP3 player and go back to the beginning of my program, but if the MP3 finishes playing its audio and the user is still listening, I play a busy signal MP3 on repeat until the user hangs up the phone.
Half of the messages are a quick 7-digit dialing sound, followed by some amount of ringing, and then finally various voicemail messages. The other messages are clips from movies, a greeting from my family, and one joke message where the user is put on hold and The First Noel muzak is played for a couple of minutes.
The MP3 Player
I started with the AU5017 by MDFly, but they never seemed to really support it after their initial release of it, and the firmware running on it seemed to be very buggy. After many frustrating nights working on code to work around the AU5017’s flaws, I finally abandoned it for the DFPlayer Mini. This is a nice little MP3 player that is being sold by numerous companies (so clones of the original), that has decent support throughout the community.
This device has a weird command & control, but fortunately Michael Miller (aka Makuna) has written a great library for talking to the module. Using his libraries, I was able to throw a couple of commands down and was instantly talking to the device, it couldn’t have been easier (and when I did have a question about how he was handling looping, he responded the same night, so great customer service). If you are going to use this module, I highly recommend using Michael’s libraries that he supplies for free. My source code can be found here.
The one word of warning on this module I have is to add a diode to its 5V power rail if powering it off of the Arduino’s 5V line. I did not experience any issues, but others heard a constant hiss on their speakers if they didn’t do this. Another precaution I took (based on other’s feedback while researching the part) was to add a 1K resistor to both the RX and the TX serial lines between the Arduino and the MP3 player. That is it for mods, otherwise you can hook up the module as seen here. The code is pretty straightforward and can be found here.
Weatherproof Box
Weather was going to be a major issue for this prop since it is an indoor phone. I ended up creating a lighted box that has a plexi-glass door on the front. The user can then slide open the door and use the phone. When they are done, they can close the door to protect the phone from the elements. Nothing too fancy, but it should be good enough to keep most of the rain off of it.
The North Pole Globe
Wanting to add a little pizzazz, I decided to add a North Pole globe to the top of the candy striped PVC. This is a plastic globe that would go on a ceiling fan for covering the light bulb. It fits (a hair loose) nicely over a 3 inch PVC pipe.
I had some leftover 4ct. WS2812 pixel strips that had been cut from my Pixel Matrix lying around, so I took 3 of those strips and glued them to a 1 inch PVC pipe that was mounted within the globe. Then using another Arduino, I had the lights slowly fade from red -> orange -> yellow -> green -> blue -> purple -> white. It is a nice effect that helps the display pop a little. Much like my Pixel flood lights, I used the FastLED in Arduino to whip something up. The code can be found here.
Power
There isn’t too much to the power requirements here. The Arduino can run off of a USB plug, so I am using one of those standard USB cell phone wall chargers to power it. The MP3 player also takes 5V, so I power it off of the 5V output on the Arduino board. The spotlight to light up the enclosure is just a 120VAC LED spotlight, so that will be straightforward as well. All-in-all, this will be a very low-powered prop.
“